When you prepare images for ebooks or websites, you should always compress them to make the file size as small as possible.
But compressing images doesn’t mean reducing their size dimensions. Image compression decreases the file size but maintains the image’s original physical dimensions.
This process strips the image of unnecessary embedded data and adjusts the resolution and quality, producing a much-reduced file size.
Smaller file sizes are crucial for performance and cost-efficient ebook downloads.
The cost of images for ebooks
If you publish on Amazon Kindle and use images in your ebooks, large image files can dramatically increase your overall ebook file size.
You are charged for ebook delivery by Amazon based on the size of your ebook, so be aware.
Publishing a Kindle ebook with a large interior file size will quickly reduce your ebook royalty.
This is why you always need to compress images for ebooks.
The key issue with images is finding the right balance between image quality and file size for the location where the image will appear.
For a website, an image doesn’t need to be of high quality and resolution.
As long as it is sharp and clear, it’s fine.
For an ebook, consider that it is highly unlikely that it will be read on a high-definition device.
A Kindle ebook reader is certainly not one, and many models are only black and white.
Therefore, high-resolution images are definitely not necessary because they can cost you lost royalties.
Steps before you compress an image
Before you start, the most important step is to change the physical dimensions of an image.
You need to resize it to suit where you are going to use it.
For ebooks, consider that a Kindle device is 600 pixels wide. So, your image width dimensions should be no larger than this.
For a website, 1200 pixels is usually an appropriate size.
Once you decide on the dimensions, you need to resize your image.
But before you do, make a copy of your image so you can keep the original.
You can use Preview on an Apple or Paint on a PC.
Now crop and/or resize the copied image to the dimensions you want to use.
After that, make sure you save your resized image and give it a new file name.
Now, you can take the next step and compress your image.
There are many ways to compress a JPEG image or PNG image online.
A quick Google search for “free image optimizer” will find a lot of tools.
Most of them work quite well, so you can’t go far wrong.
But if you are not sure which one to choose, check this listing of some of the best free online optimizing apps that will do the job for you.
Compress your image
For this example, my original image was 4.06 megabytes.
That is way too big for an ebook or any form of online use.
Let’s look now at how well compression reduces the image file size.
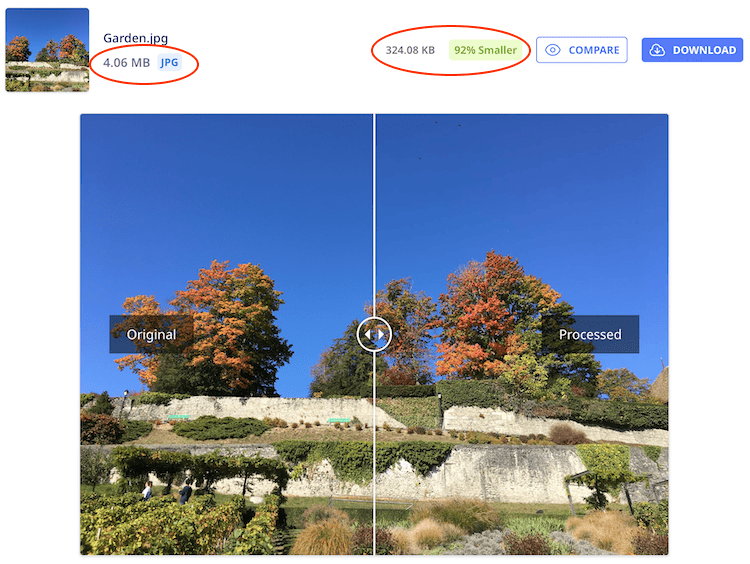
You can see the result above.
The proceed size is only 324.08 kilobytes, which is 92% smaller than my original image.
Now, I have my image at a fraction of its original file size.
But importantly, without any noticeable visible loss of quality or aspect ratio dimension.
Can you compress offline?
If you have an Apple computer, the quickest and easiest way to compress images for use in ebooks is to use a free application, ImageOptim.
It is a very simple drag and drop application.
You can adjust the settings to suit any level of compression for a JPEG, PNG, or even a GIF.
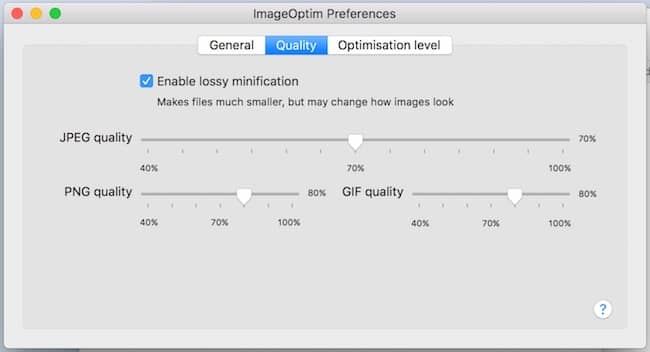
Image compression to reduce image size is quick and easy with this free little app.
It saves you a lot of bandwidth, which reduces the loading speed of your websites and blogs.
For ebooks, compressing all your images will reduce Amazon Kindle’s Whispernet delivery charge, so your royalty will be higher.
These are both very good reasons to learn how to compress images.
It’s easy to do, so make a habit of compressing all of your online and ebook images.
What do I use?
For every image that I add to my websites or ebooks, I use ImageOptim because it is so quick and easy.
You can see my settings for it in the image above.
All I need to do is drag the image file into the app, and it’s all done in less than a second.
But I have one more tool to compress images even more, which I use for all my blogs and websites.
WP Smush is a free WordPress plugin that compresses images automatically when uploaded to the WordPress media library.
It doesn’t do as good a job as ImageOptim by itself.
But it does help by reducing my already compressed images just a little bit more.
Again, without any quality loss, it ensures that my website pages will load lightning-fast.
Quick book cover tip
This article doesn’t apply to book or ebook covers, which must be high-quality and high-resolution for publishing.
But do you want a compressed version of your book cover to use on your website or for marketing and promotion?
You can resize and compress it yourself. But there is an easier and quicker way.
Just go to your book page on Amazon.
To download your book cover image, right-click on it and then download the image.
You will get a fully compressed version because Amazon has done all the compression work for you.
Summary
For any image you want to use online, always think first about how big it is.
A large image file size will always slow things down or, in the case of ebooks, reduce your royalties.
Compressing images for ebooks or before uploading them to your blog or website will only take a few seconds.
Then, you can be absolutely sure that your page will load faster or that you won’t lose money on your ebook sales royalty.
Related Reading: How To Create Unique Free Images For Your Blog Posts

