Many writers now use a self-hosted WordPress blog to earn extra income from content marketing, books, and advertising. A WordPress sandbox is the best way to protect your income.
WordPress is a powerful blogging platform.
But the vast number of useful features, themes, and plugins, require good website management skills and basic security knowledge to keep it operating efficiently.
For those who use a self-hosted WordPress site, not the free WordPress.com version, you know that it is a nervous time when upgrading to a new WordPress version and when plugins and themes need updating.
Make sure you always have reliable backups
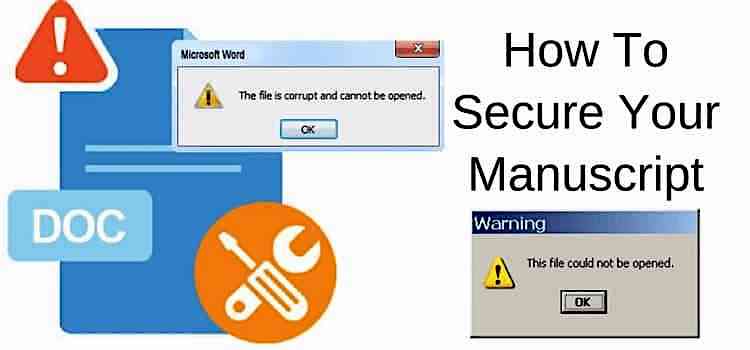
Everything is working fine, and then one WordPress plugin update can cause a conflict, and your site goes down or hangs in maintenance mode.
If a few plugins have been updated at the same time, it can sometimes take hours to find out where the problem lies.
Even minor updates to WordPress versions can cause problems if plugins that were working well before are not compatible with the new upgrade.
To guard against most of these issues that can arise, you always need a backup.
Luckily most top-quality web hosts offer a backup on your server as part of your hosting account.
However, even this remedy can be time-consuming, and during the time it takes you to do a restore, your site is down.
If you have a server issue with your host, you may not even be able to access your backups.
A much better and more secure way is to use a dedicated WordPress backup tool.
Updraft Plus is a good option because your backups can be stored remotely on your computer, Google Drive, or Dropbox.
Why use a WordPress Sandbox
You can avoid disasters by testing new versions and plugins in your WordPress Sandbox.
Creating a sandbox is a much better way to avoid all of these problems.
It is well worth the investment of the hour or so. It will save you hours and hours of problems and give you total peace of mind.
Install a second WordPress site on your host server, and use it as a testing environment or playground if you like.
You can experiment and test new WordPress themes and theme options. In addition, you can check WordPress upgrades, try a new WordPress plugin, and avoid any possible plugin conflicts.
The best part is that you do all this before making any changes to your existing WordPress site.
You can test drive with a different WordPress theme, new plugins, and make any number of changes to your site content.
Then when you are sure everything works, make the changes or upgrades, step by step, to your live site, knowing everything will work correctly.
Creating your WordPress Sandbox
To create a Sandbox directory, do a WordPress install on your web hosting server in a sub-folder.
Typically this will be ‘mysite.com/wordpress.’ Then make the changes to your wp config.php to rename your new site to something like Test Blog or My Blog Lab.
Once your newly created sandbox is up and running, install the plugins and themes your live site uses.
A good tip is to create a child theme or themes to make sure a theme update doesn’t overwrite any changes you have made.
Now you can make the changes to your options and admin panel, so your new sandbox site looks and behaves almost the same as your live site.
To get started, export some posts from your live site and import them into your Sandbox site.
Check your wp-config and wp-contents folder to see if you have everything you need, such as post and featured images.
One Big Tip! Go to the Settings Tab and then Reading and tick the box, Discourage search engines from indexing this site.
This will stop search engines from indexing your WordPress test site.
Also, remove any affiliate links you have, and don’t install an XML sitemap. If you want, you can also add a robots.txt file to block indexing.
Online or offline sandbox
I prefer to use a sandbox that is online because I can check more thoroughly. Especially for design elements that affect site loading speed and core web vitals.
But if you prefer, you can install a test site on your computer.
Now you are ready to start test driving everything, experiment, upgrade, and even make mistakes before making changes to your live site.
If you manage to blow up your Sandbox, don’t worry because you will have discovered a problem before it had a chance to do the same to your live site.
If you strike trouble, go back to your Updraft backup, restore it, and try again.
Learn, experiment, and have fun with a WordPress

With your new sandbox site for experimenting, you will save yourself all the worry about updating your live site.
If you have reliable backups for both sites, you will be totally secure.
A Sandbox is the best way to learn how to use more advanced functions.
If you are trying to learn CSS or how to write PHP code, it is the best place to experiment and try out your new skills.
When you learn anything new, you will make a few mistakes. Having a sandbox lets you learn by doing.
When you are sure that any changes or modifications you have done work correctly, you can add them to your live site with confidence.
Setting up a new site
Another great use for a sandbox is setting up a new site or perhaps an online store.
Build your site, starting with your front page. Try choosing a theme, and see how it works. If you are not happy, try another free theme.
Don’t start creating any pages or blog posts until you are happy with your WordPress theme and all its functions and options.
Then you can add your about page, contact form, and any other basic pages you think you will need.
Once you are happy with your new site, you can copy it to its new domain name on your WordPress hosting.
Check your security
Setting up a Sandbox is an excellent time to review your site security.
You should have the same security settings and plugins for both your live and test sites.
Here are a few quick suggestions to help you secure your sites.
1. You must change the default username and password
Without a doubt, this is the very first security step you need to take.
Change your default username.
WordPress assigns admin for a new installation.
Leaving your username as admin is an easy and open invitation for hackers to break into your site.
To make your site secure, change your username to something that is not easy to guess.
Don’t use your name or the name of your blog. These are far too easy for hackers to guess.
While it doesn’t need to be overly long, it should be at least 8 letters.

At the same time, don’t forget to change and strengthen your password.
A strong password is by far the very best protection you can have for your site.
It should be a minimum of 8-10 characters long and include at least one number, symbol, and capital letter.
Make sure you do the same for any other user accounts you have on your site.
WordPress websites are a favorite target of hackers, so make it as difficult as possible for them.
If you want even more security, you can opt for double factor authentication.
2. Install Akismet

Comment spammers are rife on WordPress, and they can drive you up the wall.
The best way to block them is with Akismet Anti-spam. It’s a free plugin, and it is very easy to install.
Once you activate Akismet, you will be safe from 99.999% of comment spam.
3. Wordfence is a must

When I first installed Wordfence a few years ago, I was staggered at the number of attempted attacks on my site that I had no idea about.
Wordfence is a very effective free WordPress security plugin, but it does take a little while to understand all the setup options.
Using the default options works well to start, but a little refining is worthwhile once you are familiar with how it works.
There is only one option I would recommend changing. Turn off ‘live traffic’ as it can be a bit of a resource hog.
But you will still be able to see any bad guys on live traffic that are trying to hack your site.
Don’t worry, though; Wordfence will block almost all of them at an IP address level.
It will limit login attempts and keep you safe from brute force attacks.
You can scan your site for any problems and check the audit logging for any issues.
If you haven’t installed Wordfence, do it.
There is a paid version of Wordfence.
But after many years of use, I have found that the free version does everything I need to keep the hackers and bad guys out.
Conclusion
Now you know how to test WordPress sites before going live.
I have used my sandbox for years now, and it has helped me learn so many WordPress skills.
In doing so, it has also saved me a lot of money. I don’t need to pay a developer anywhere near as often as when I first started blogging.
There is no reason why you can’t have two or three Sandboxes should you have more than one live site.
I added another recently, and I am using it to develop a new website.
If you are using WordPress, you should have at least one testing environment, if only for safety and security.
But the benefit of being able to learn and improve your WordPress skills is the biggest bonus.
Related Reading: Cloudflare Cache Everything Improves WordPress TTFB By 90%