Free image optimization tools make the job of preparing your images for publishing a quick and easy task.
When you plan to use images for your ebook, blog, or anywhere online, you need to make sure you resize and compress your images.
You might use images from your camera or phone or download free stock images, but the original dimensions and file sizes will always be too big.
Luckily, it’s easy to make sure you optimize your images to remain sharp and clear and use the smallest file size possible.
How to resize and optimize your images
There are a lot of image tools available for free online. The possibilities are almost limitless.
But before you start, you have two important tasks. The first is to resize your image to suit where you will use it.
Most blogging platforms use responsive images to scale images for different screen sizes. If you use an image 2,400 pixels wide and 3 MB, your platform will automatically resize your image.
But it will still be 3 MB and take a long time to load. For a phone user, it will take ages. When you use an image for your blog, you should resize it to the maximum width of your blog, not including any sidebars.
The average size of a blog’s main content screen is usually around 800 pixels.
To check your blog content width, right-click on any blog page in Chrome. Then select Inspect at the bottom of the dropdown menu. It will open Chrome Developer Tools.
Select Elements, and then click the select arrow. It will turn blue when activated. Then click on your content window.
The dimensions will show in a popup window. As you can see, this blog is 771 pixels wide.
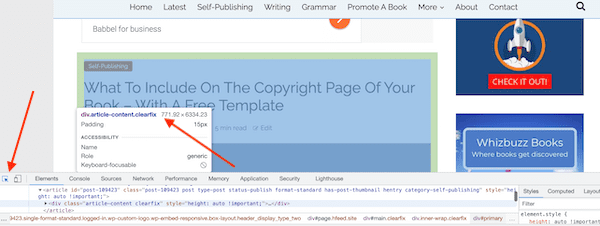
Now that you know your blog’s width dimensions, you can resize all your images to ensure they are no wider than your screen size.
Ebook screen sizes
If you use images within an ebook, the same applies. For example, a Kindle Paperwhite has a screen dimension of 600 x 800 pixels.
So, you need to make sure you don’t use images that are more than 600 pixels wide.
Be aware that Amazon KDP has a download charge for ebooks. If your images are large, you could lose a lot of your royalties.
Always resize your images as your first step.
After that, you need to reduce the file size using image compression. You can use plenty of tools to do this, which I have included in my list of tools below.
It will be up to you to decide how much compression to use. The smaller your final file size, the faster it will load.
However, going too far can reduce the quality of the image. So, you always need to find a balance between being as small as possible and as clear as possible.
Now, let’s move on to the best free tools I use for image optimization.
1. Image Resizing
If you have a PC or a Mac, you can use the tools that come with your operating system.
With Windows, you can use the built-in Photos app or Microsoft Paint.
On a Mac, you can use Preview.
But you can also do it online with an Online Image Resizer. There are plenty of free apps that let you select either a percentage reduction or you can set your preferred dimensions.
Resizing is your first job. No matter which tool you use, you can now get on with other tasks.
2. ImageOptim
For Mac users, ImageOptim is the best free app you will find for managing image compression.
It’s a small app that sits in your dock. All you need to do is drag your image files into it, and it starts work.
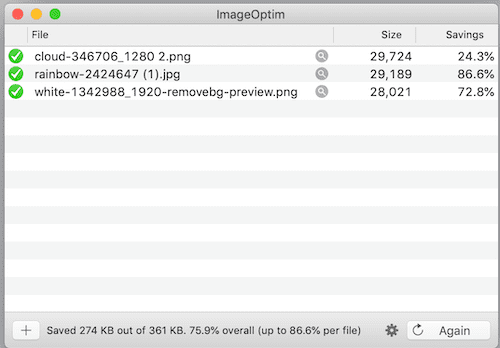
You can change your jpeg, png, and gif file compression settings.
It is one app that I can say that I use every single day.
3. Online Image Optimizer
If you don’t have a Mac, don’t worry. You can use any free online image optimizer to reduce your image files.
I’ve used Optimole for the example below.
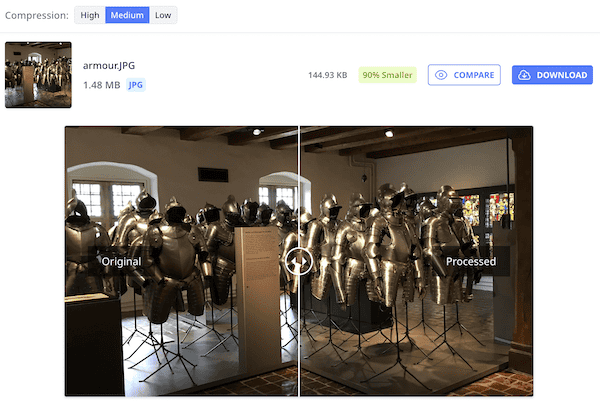
All you need to do is choose and upload your image file.
In the example above, with medium compression, the image has been reduced from nearly 1.5 MB to 143kb.
That’s a reduction of 90%.
As an alternative, you can try Img2Go, which has no limit and is free to use without any need to register.
4. TinyPNG
Even though I have ImageOptim, I often use TinyPNG when I’m working with png vector graphics.
It usually does a slightly better job, so it’s worth the extra few seconds.
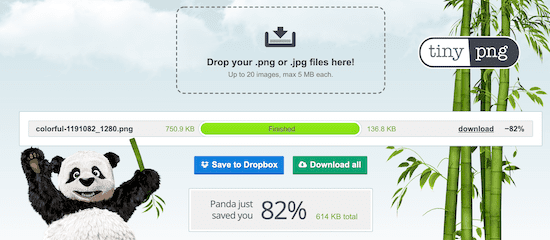
Again, all you need to do is drag and drop your image file and then download the result.
5. Remove Background
It is one of my favorite free image tools.
RemoveBG works with jpeg and png files. It’s so useful when you want to make a png image background transparent.
Here’s the result using a free image from Pixabay.


The app’s best feature is that when you remove the background from a jpeg image, the app converts it to png, so the background is transparent.
If you use Canva, you can merge your images to create a unique new image.

You can see why RemoveBG is one of my favorite image apps.
6. Convert Image Files
If you need to convert image files from jpeg to png or reverse, you can use the export functions in your built-in apps on your computer.
But you can also use free online image converters if you want more options.
Convertio is a very simple app that will do the job for you.
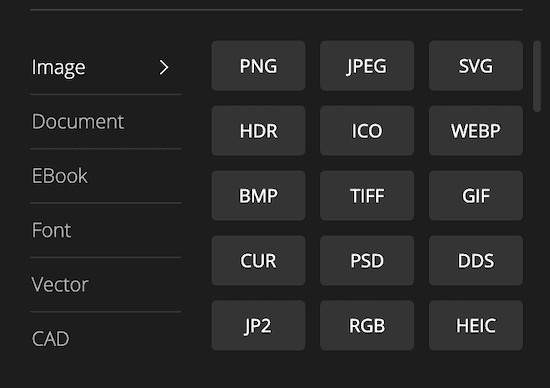
With the app, you can convert jpeg, png, svg, plus a whole host of others.
7. Canva
When it comes to images, there is one tool I use day in and day out.
With Canva, I can create any number of images for everything I publish. It’s easy to add filters and effects, adjust, and flip.
With just a few clicks, here is a new version of the image I used above.

One of the significant advantages is for authors. You can download the images you create in high-quality pdf print format.
It is a great feature to have when you are designing book covers.
Conclusion
You don’t need to spend a penny on tools for image optimization.
All you need to do is spend a few minutes preparing your images before publishing online or self-publishing an ebook.
But if you don’t take the time, it can cost you ebook earnings or blog visitors because your site loads too slowly.
There are plenty of apps for you to choose from, but the ones I have listed above will do everything you need.
I can also vouch that they work because I use most of them every day.
Related reading: How To Make An Animated Gif For Free For Your Blog Posts

